
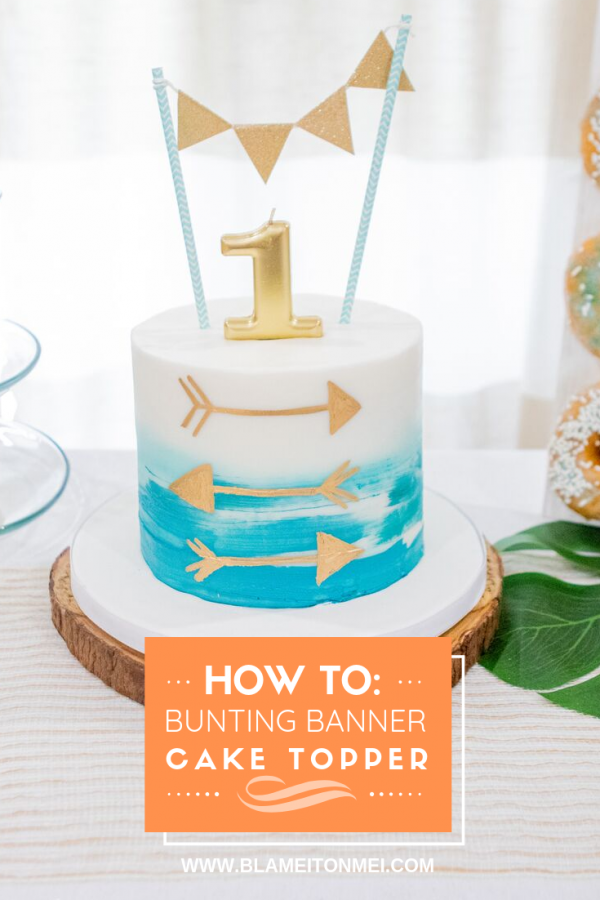
This how to cake topper tutorial of a bunting banner is super simple to do and only takes a few dollars to make.
![]()

ow to cake topper tutorial of a bunting banner is super simple to do and only takes a few dollars to make.
[one_half]
For Julian’s 1st birthday luncheon I decided to create my own cake topper because I wasn’t able to find the right one online or in stores. This was my inspiration but in the colors that would fit the Wild One theme. I searched YouTube and after seeing 2-3 videos, I was ready to make it happen.
[/one_half][one_half_last]
Para la pequeña celebración del primer cumpleaños de Julián, decidí crear mi propio adorno de pastel porque no pude encontrar el adecuado en línea o en las tiendas. Esta fue mi inspiración, así que busque en YouTube y después de ver 2-3 videos, estaba lista para hacerlo.
[/one_half_last]
[one_half]
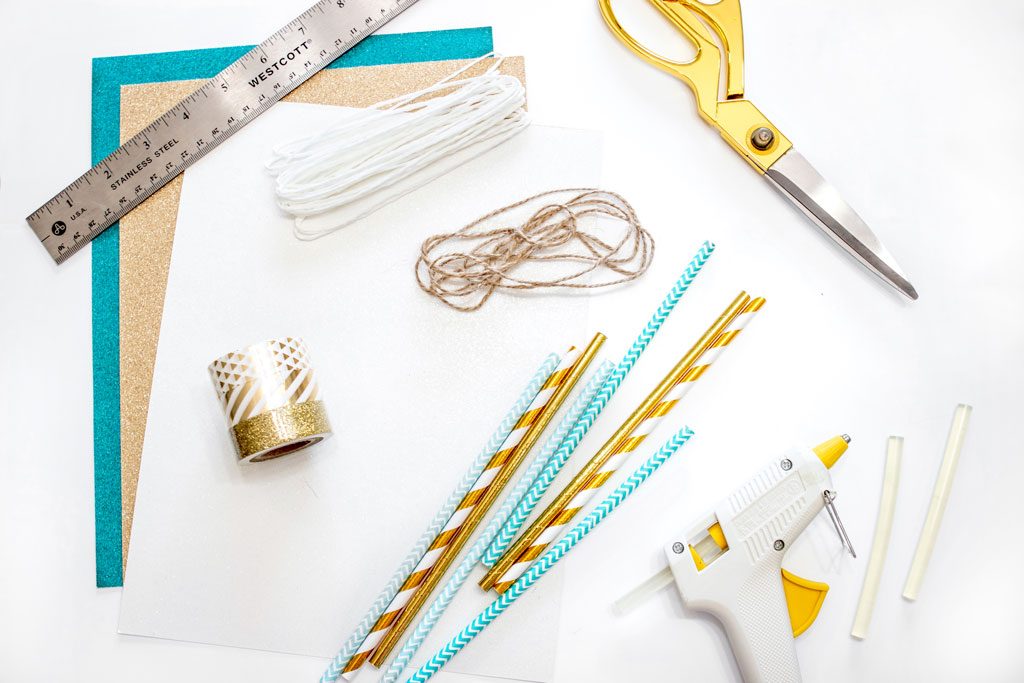
What you’ll need
- Scissors
- Ruler
- Cardstock paper (I used this one)
- Any type of string/twine (like this one)
- Hot glue gun
- Glue sticks
- Straws (I used these)
[/one_half][one_half_last]
Lo que necesitarás
- Tijeras
- Regla
- Cartulina (yo use esta)
- Cualquier tipo de cuerda (como esta)
- Pistola caliente de silicona
- Pegante de silicona
- Pitillo/sorbete (yo use estos)
[/one_half_last]
[one_half]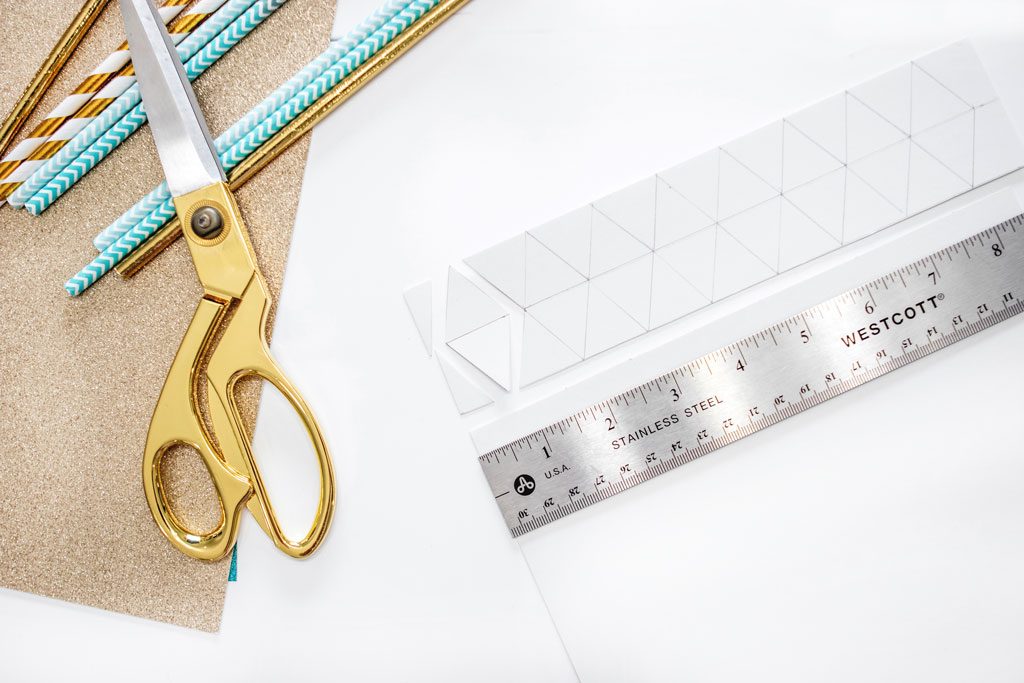
[/one_half][one_half_last]
[/one_half_last]
[one_half]
How to do it
- On your cardstock paper, measure 2” (at the longest side) rhombus shapes and cut as many as you’d like.
- Fold shapes in half to form a triangle (if cardstock is thick, score rhombus shapes beforehand for easy folding).
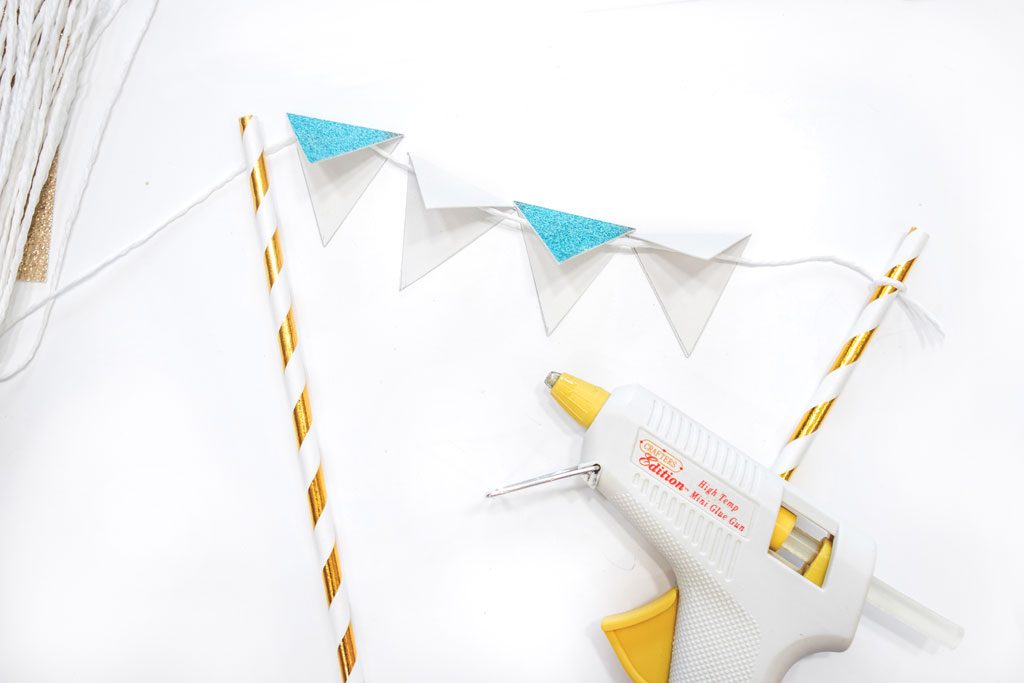
- Measure and cut your string to desired length.
- Tie one end of your string to your straw (I left about 1/4” from the top, but this is up to you).
- Decide where on the string you want to start gluing your triangles.
- Place triangle shapes side to side along the string.
- Place a glue dot at the point of the triangle and a line across the base (where the string is).
- Fold and hold for a few seconds.
- Continue steps 7-8 with all your desired triangles.
- Tie the other end of your string to your second straw.
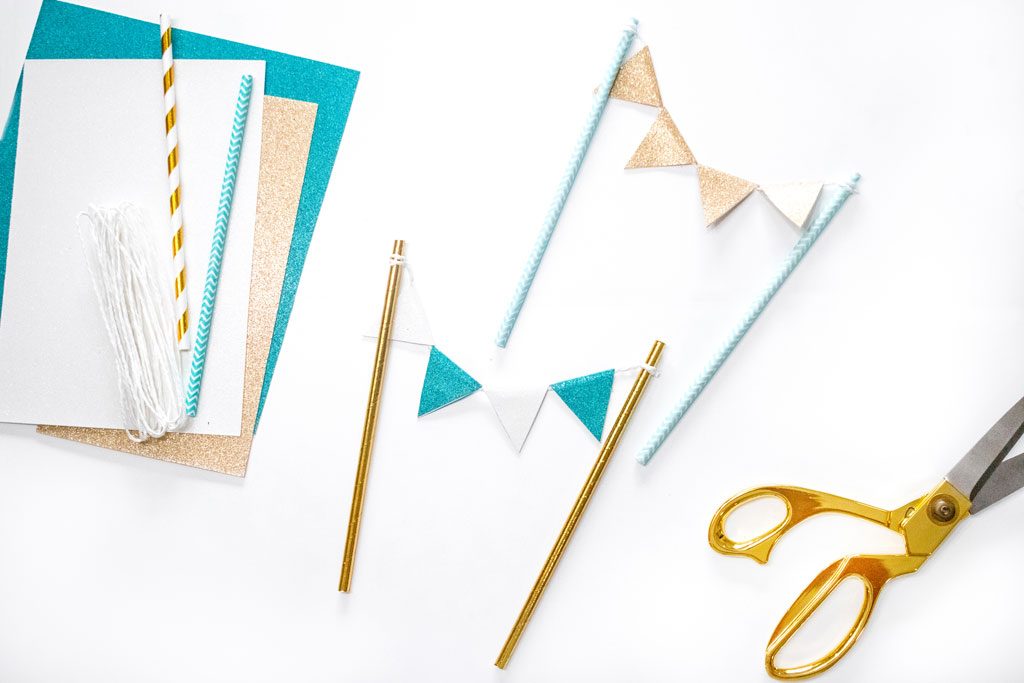
- YOU ARE DONE!
[/one_half][one_half_last]
Cómo hacerlo
- En su papel de cartulina, midan formas de rombo de 2″ (en el lado más largo) y corte todas las que desee.
- Doblen los rombos por la mitad para formar un triángulo (si la cartulina es gruesa, marquen por la mitad las formas de rombo de antemano para facilitar el plegado).
- Midan y corten la cuerda al largo deseado.
- Aten un extremo de la cuerda a su pitillo (yo dejé aproximadamente 1/4” desde la parte superior, pero esto depende de ustedes).
- Decidan en qué parte de la cuerda quieren empezar a pegar sus triángulos.
- Coloquen los triángulos de lado a lado a lo largo de la cuerda.
- Coloquen un punto de pegamento en el punto del triángulo y una línea a través de la base (donde está la cuerda).
- Doblen y sostengan por unos segundos.
- Continúe los pasos 7-8 con todos sus triángulos deseados.
- Aten el otro extremo de la cuerda a su segundo pitillo.
- ¡Y HECHO!
[/one_half_last]

PIN FOR LATER

How cute! This turned out so beautifully .
Maureen | http://www.littlemisscasual.com
Thanks so much Maureen!